Ununtu 18.04でPICkit3を使う方法
・MPLAB X IDE
・MPLAB IPE
・コマンドライン
それぞれの方法
MPLAB X IDEでプログラムを書き込む方法
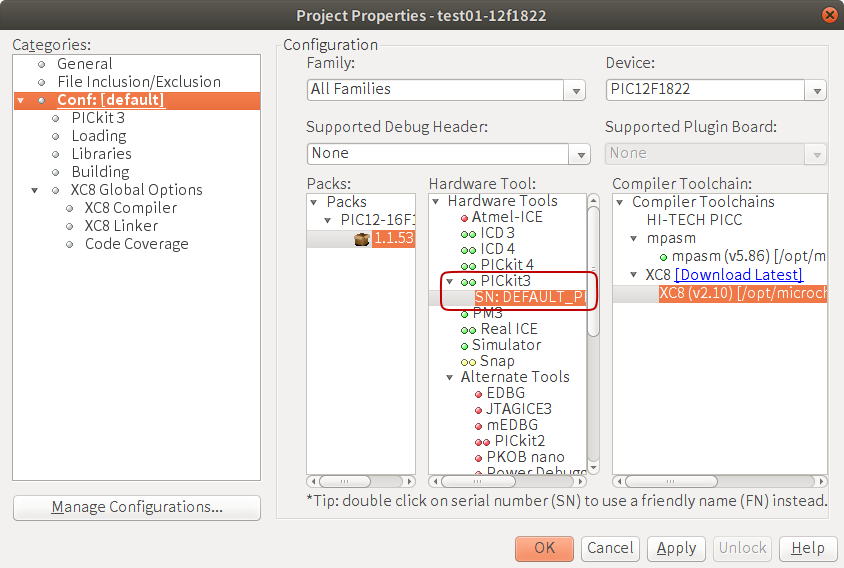
プロジェクトのプロパティで、PICkit3を使う設定にする
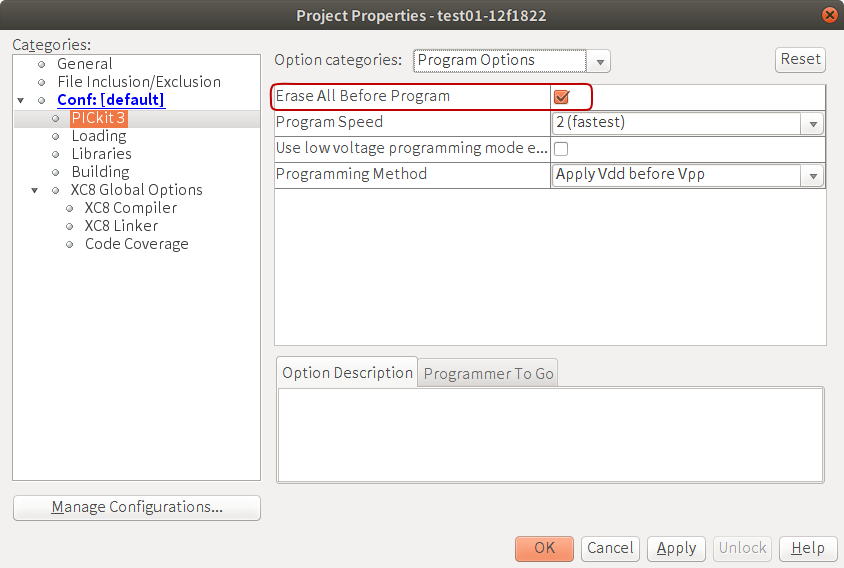
Erase All Before Program (書き込む前に、全体を消去する)を選択
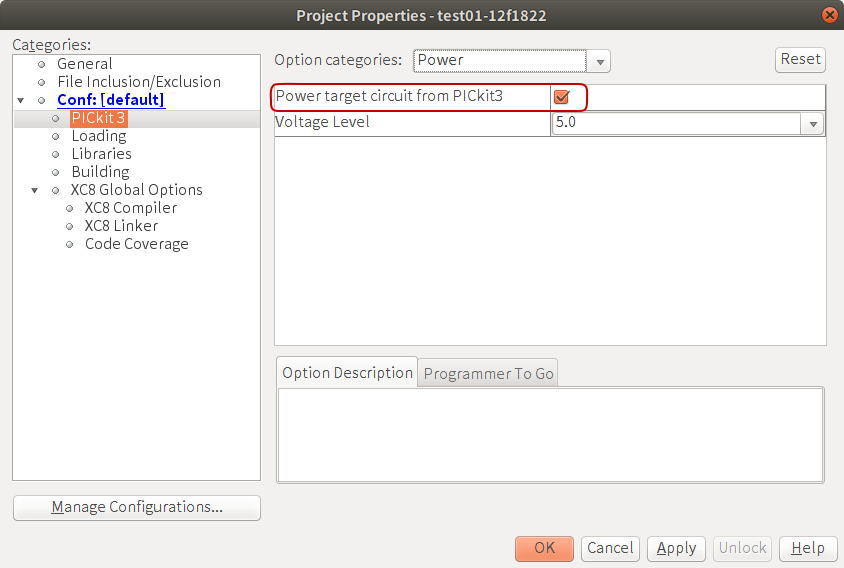
Power target circuit from PICkit3 (PICkit3から給電する) を選択
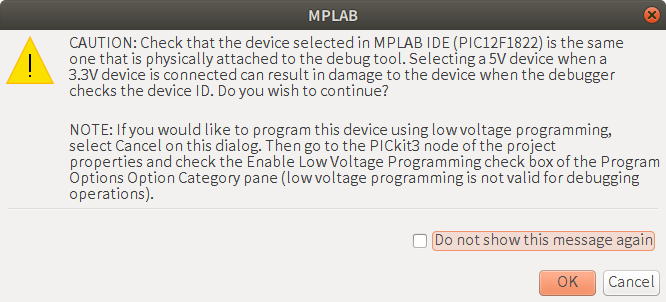
PICkit3をUSB接続すると、「5Vで給電するが問題ないか?」と確認するダイアログが表示される。 「OK」を押して確認する。
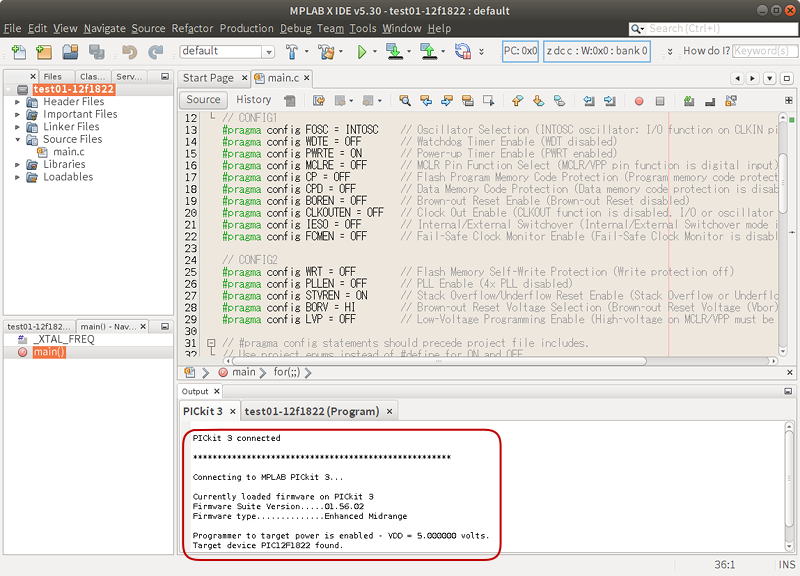
PICkit3を接続すると、コンソール画面に接続されたデバイスの状態が表示される
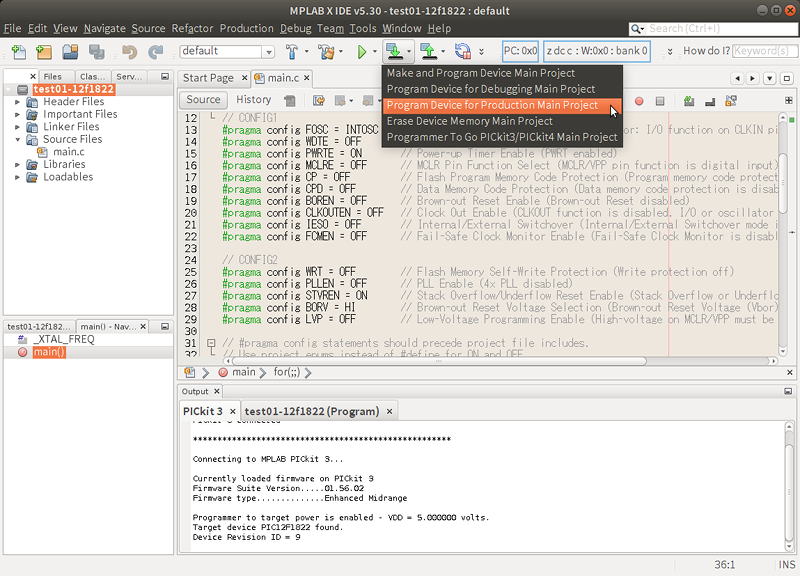
Program Device for Production Main Project を実行し、PICに書き込みを行う
コンソールログに表示されるのは、次のような内容
PICkit 3 connected

*****************************************************

Connecting to MPLAB PICkit 3...

Currently loaded firmware on PICkit 3
Firmware Suite Version.....01.56.02
Firmware type..............Enhanced Midrange

Programmer to target power is enabled - VDD = 5.000000 volts.
Target device PIC12F1822 found.
Device Revision ID = 9

Device Erased...

Programming...

The following memory area(s) will be programmed:
program memory: start address = 0x0, end address = 0x7ff
configuration memory
Programming/Verify complete
MPLAB IPEでプログラムを書き込む方法
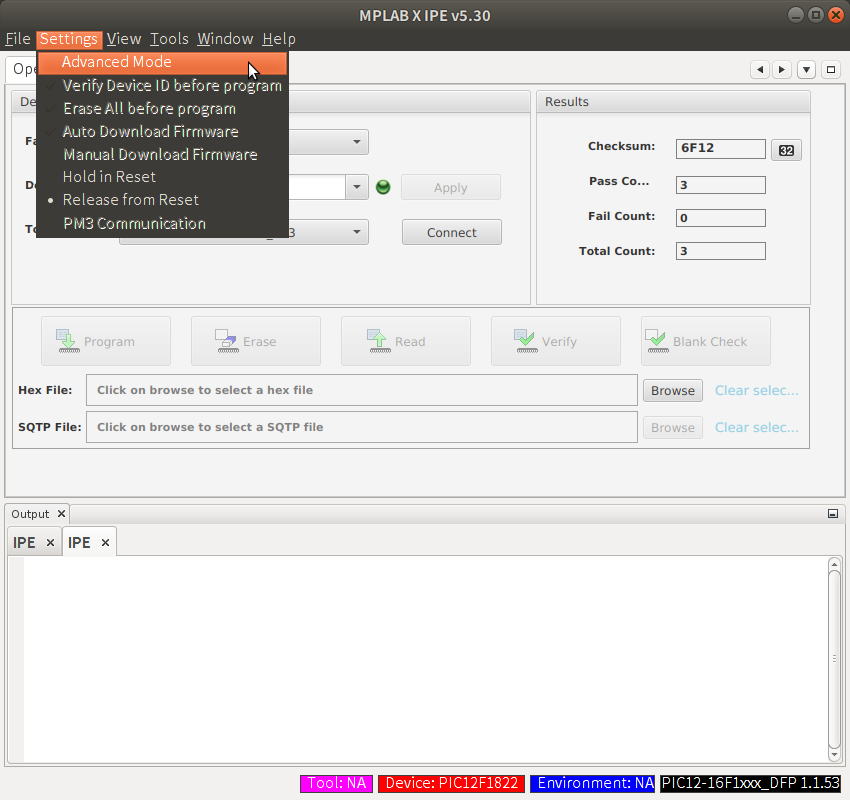
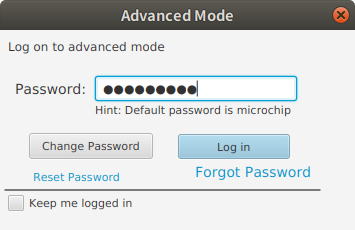
MPLAB IPEを起動し、Advanced Modeに入る
デフォルト パスワードは「microchip」
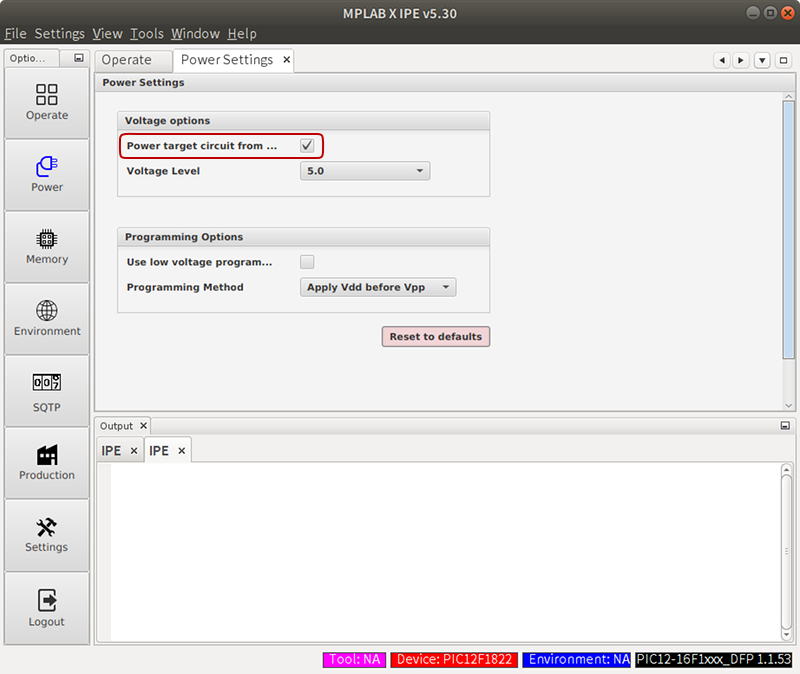
PICkit3から給電させるために、Power Target Circuit from ... にチェックを入れる
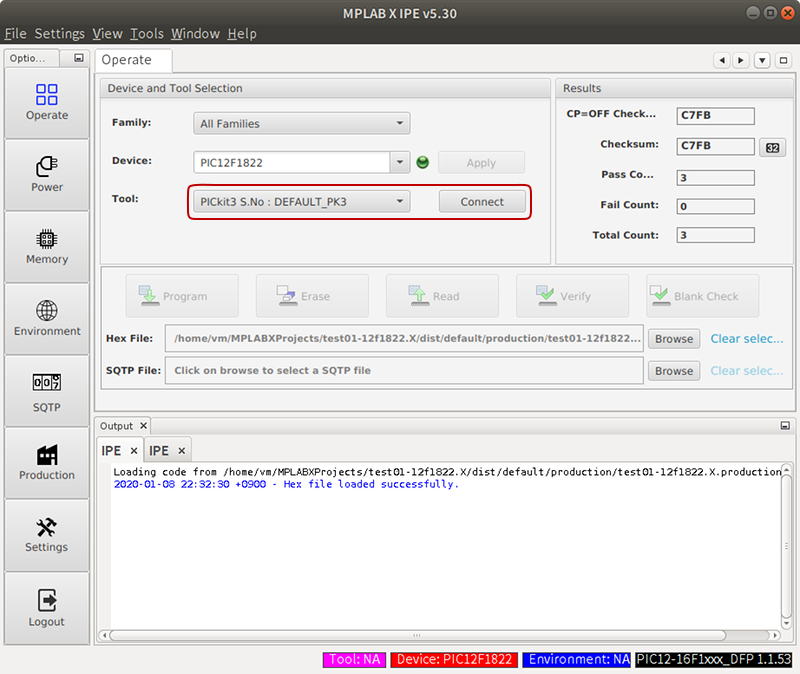
デバイスに接続する (Connect)
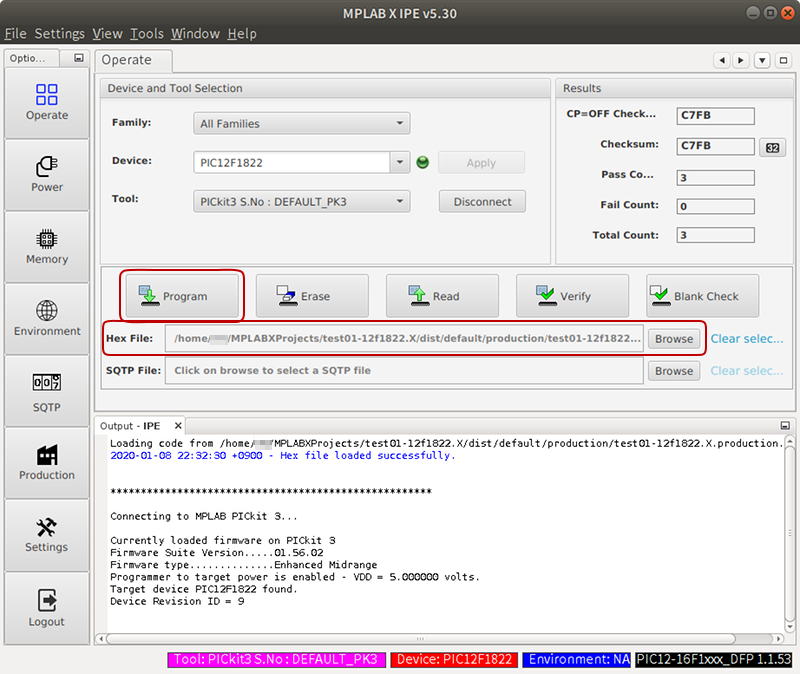
HEXファイルを選択し、Program ボタンを押して書き込みを行う
コンソールログに表示されるのは、次のような内容
Loading code from /home/USER/MPLABXProjects/test01-12f1822.X/dist/default/production/test01-12f1822.X.production.hex...
2020-01-08 22:32:30 +0900 - Hex file loaded successfully.

*****************************************************

Connecting to MPLAB PICkit 3...

Currently loaded firmware on PICkit 3
Firmware Suite Version.....01.56.02
Firmware type..............Enhanced Midrange
Programmer to target power is enabled - VDD = 5.000000 volts.
Target device PIC12F1822 found.
Device Revision ID = 9

2020-01-08 22:34:48 +0900 - Programming...

Device Erased...

Programming...

The following memory area(s) will be programmed:
program memory: start address = 0x0, end address = 0x7ff
configuration memory
Programming/Verify complete
2020-01-08 22:34:54 +0900 - Programming complete
コマンドラインから書き込む方法
MPLAB X IDEでインストールされるmdb.sh (Microchip Debugger (MDB))を用いて書き込む
$ cd ~/MPLABXProjects/test01-12f1822.X/dist/default/production

$ mdb

>device pic12f1822
1 06, 2020 11:15:04 午後 com.microchip.packslib.packutilities.HttpConnectionFactory openHttpUrlConnection
情報: No change in ETag since previous connection, skipping file download from https://packs.download.microchip.com/index.idx.gz
1 06, 2020 11:15:04 午後 com.microchip.packslib.packutilities.HttpConnectionFactory openHttpUrlConnection
情報: No change in ETag since previous connection, skipping file download from https://packs.download.microchip.com/index.idx.gz

>set poweroptions.powerenable true

>set voltagevalue 5.0

>hwtool PICkit3 -p
1 06, 2020 11:17:05 午後 org.openide.util.NbPreferences getPreferencesProvider
警告: NetBeans implementation of Preferences not found
1 06, 2020 11:17:06 午後 com.microchip.mplab.mdbcore.RealICETool.RIMessages OutputMessage
情報:

*****************************************************

Connecting to MPLAB PICkit 3...

Currently loaded firmware on PICkit 3
Firmware Suite Version.....01.56.02
Firmware type..............Enhanced Midrange

CAUTION: Check that the device selected in MPLAB IDE (PIC12F1822) is the same one that is physically attached to the debug tool. Selecting a 5V device when a 3.3V device is connected can result in damage to the device when the debugger checks the device ID. Do you wish to continue?

NOTE: If you would like to program this device using low voltage programming, select Cancel on this dialog. Then go to the PICkit3 node of the project properties and check the Enable Low Voltage Programming check box of the Program Options Option Category pane (low voltage programming is not valid for debugging operations).

>  ← ここで ENTER キーを押す
Programmer to target power is enabled - VDD = 5.000000 volts.
Target device PIC12F1822 found.
Device Revision ID = 9

>set programoptions.eraseb4program true

>program test01-12f1822.X.production.hex
Programming target...

Device Erased...

Programming...

The following memory area(s) will be programmed:
program memory: start address = 0x0, end address = 0x7ff
configuration memory
Programming/Verify complete
Program succeeded.

>quit
